
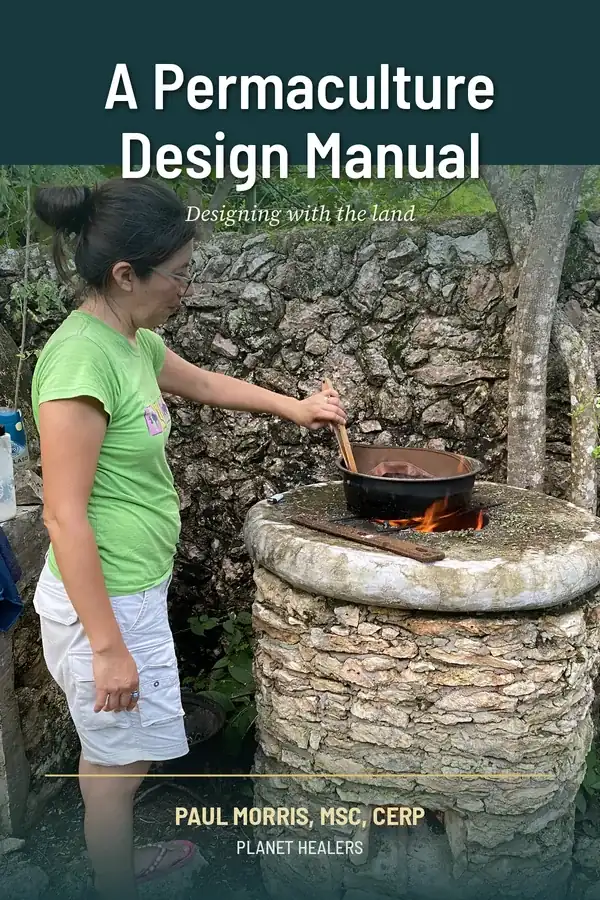
A Permaculture Design Manual
Designing with the land, for people who want to heal it
Planet Healers | Paul Morris
Field-grounded in temperate Ontario and the tropical Yucatan
How to use this manual
This is a working manual, not a book to read once and shelve. Permaculture is a design practice. You learn it by designing, watching what happens, and adjusting. So the chapters build on each other, and every one ends with something to go and do.
Work through it in order the first time. The early chapters give you the ethics, the principles, and the way of looking that everything else depends on. After that you can jump to whatever you need. Designing a water system this week? Go to the water chapter. Trying to figure out where the chicken run should sit? Zones and sectors.
I teach permaculture through the lens I know best, which is ecological restoration. Thirty years of it. Twenty running a native plant nursery in Ontario, ten bringing a worn-out piece of karst limestone in the Yucatan back to forest. That background shows up all through this manual, and I think it makes the design stronger. Permaculture and restoration ask different questions. One asks how to feed and shelter people from a piece of land. The other asks how to help a damaged place become whole again. The best designs answer both at once, and I'll show you where they meet and where they pull against each other.
A note on honesty, because it matters to me. Where I use a number or a place, it's real. Tsunul Reserve is 39 hectares. It holds 514 documented species and counting. We made 60,000 clay balls to plant an aquatic system. Those aren't illustrations I invented to make a point. They happened. When I don't know something, I'll say so. Ecology is full of "it depends," and any teacher who pretends otherwise is selling you something.
One more thing. Nothing in here should leave you feeling small or guilty. The land wants to recover. That's the most important thing I've learned, and it's the thing this whole manual rests on. Your job as a designer isn't to force a landscape into shape. It's to remove what's in the way and give the living system a hand. That's humbling work, and it's hopeful work, and anyone can start.
Who this is for
You don't need a science degree. You don't need land yet. You need curiosity and the willingness to go outside and pay attention.
Maybe you've got a backyard, or a balcony, or a few acres you don't know what to do with. Maybe you're part of a community garden, or you want to green a schoolyard, or you're dreaming about a piece of land you hope to buy one day. All of that is enough to start.
If you're a professional grower, a landscaper, or a restoration worker, there's plenty here for you too. But I've written every explanation for the person standing at the edge of a bare yard wondering where to begin. If a term needs explaining, I explain it by pointing at the thing itself.
Part 1: Foundations
Chapter 1: What permaculture is
Permaculture is a way of designing the places people live so they work more like a natural system and less like a machine that constantly needs feeding.
The word came out of Australia in the 1970s. Two people, Bill Mollison and David Holmgren, put it together from "permanent agriculture," and later it stretched to "permanent culture," because they realized you couldn't design a lasting food system without also designing the human side around it. Their first book, Permaculture One, came out in 1978. Mollison's big Permaculture: A Designers' Manual followed in 1988, and it's still the doorstop reference for the whole field. Holmgren's Permaculture: Principles and Pathways Beyond Sustainability, from 2002, laid out the twelve design principles most people learn today.
Here's the core idea. A natural ecosystem, left alone, feeds itself. Nobody fertilizes a forest. Nobody waters a prairie. Nobody hauls the fallen leaves away, and nobody trucks new nutrients in. The waste from one part becomes the food for another, water moves and gets stored and used again, and the whole thing runs on sunlight. It's productive, it's diverse, and it holds together for centuries.
Now look at how we usually grow food and build settlements. Straight rows of a single crop. Bare soil between them. Fertilizer trucked in, water pumped in, pests fought off with sprays, and the "waste" hauled away to rot somewhere else. It only keeps going as long as the inputs keep coming. Cut the inputs and it collapses.
Permaculture asks a simple question. What if we designed our gardens, farms, and homes to behave more like that forest? Catch our own water. Build our own soil. Let the output of one part feed the next. Stack many uses into one space. Work with the way water and sun and wind already move across a site instead of fighting them.
That's it. That's the whole thing. Everything else in this manual is method for getting there.
Permaculture is a design system, not a set of techniques
This trips people up, so I want to be clear early. Swales, food forests, chicken tractors, herb spirals, worm bins. People see those and think that's permaculture. They're not. They're techniques, and some of them will be right for your site and some will be exactly wrong.
Permaculture is the thinking that tells you which technique belongs where. It's a way of reading a place and making decisions. A swale on a flat, poorly drained clay site can drown your trees. The same swale on a dry slope can save them. The technique didn't change. The design judgment is what matters, and that's what I'm trying to teach you.
So don't collect techniques like trading cards. Learn to see the site. The techniques will follow.
Where permaculture meets restoration, and where they part
I came to permaculture sideways, through restoration, so I see the seam between them clearly. You should understand it too, because a lot of confusion lives here.
Ecological restoration tries to help a damaged ecosystem return to something like what it was, or what it could be, using the native species and processes that belong there. When I brought that Yucatan land back, I wasn't planting an orchard. I was removing the pressure, mostly the cattle and the burning, and helping native tropical forest come back to a place that had been grazed down to rock. The measure of success was the return of the wild system. 514 species. A closed canopy where there was bare karst.
Permaculture has a different center of gravity. Its first job is to provide for people. Food, water, shelter, energy, from the land, in a way that doesn't wreck it and ideally improves it. A permaculture designer will happily plant a mango tree that isn't native, or a nitrogen-fixing shrub from another continent, if it does useful work in the system.
You can feel the tension. Restoration says native, reference, wild. Permaculture says productive, useful, human. Handled carelessly, permaculture can become an excuse to plant invasive species and call it ecology. I've seen that, and I won't defend it. Handled well, the two reinforce each other. A well-designed permaculture site can be a stepping stone, a patch of living, working land that shelters wildlife, builds soil, holds water, and connects to wilder ground next door.
My honest position after thirty years: know which one you're doing on which piece of ground, and be honest about it. Grow your food in a designed, productive system near the house. Restore the back acres to what belongs there. Let the two meet at the edge, where the most life always is. Don't plant a known invasive because a permaculture book told you it fixes nitrogen. There's almost always a native or well-behaved plant that does the same job. That single discipline, choosing plants that earn their keep without escaping and doing harm, will keep your permaculture honest.
Try this: Go stand on the piece of land you want to work with, even if it's a rented yard. Ask one question and write down the answer. Is this a place I'm trying to make productive for people, a place I'm trying to return to the wild, or both in different spots? You've just done your first act of design.
Chapter 2: The three ethics
Permaculture rests on three ethics. Everything else, every principle and technique, sits on top of these. Get them wrong and you can do real damage with good tools.
They're usually written as three short phrases. Earth care. People care. Fair share. Simple enough to remember, deep enough to argue about for a lifetime.
Earth care
Care for the living world, because we depend on it completely and it doesn't depend on us at all.
This is the one restoration people feel in their bones. Healthy soil, clean water, diverse living communities. Everything human runs on those, and we've spent a couple of centuries treating them as free and infinite. They're neither.
Earth care in practice means you leave the soil better than you found it. You increase the number of species living on your land, not decrease it. You keep water clean and let it soak in rather than run off. You measure your design by what's living there after ten years, not by what you harvested this season. If the birds and insects and fungi are more abundant than when you started, you're doing earth care. If they're not, no amount of vegetables makes up for it.
People care
Meet human needs, starting with your own community, so that people can live well without stripping the earth to do it.
This ethic keeps permaculture from becoming a hair-shirt exercise. People need to eat, stay warm, have shelter and dignity and some joy. A design that provides for people is a design people will keep. A design that demands constant sacrifice gets abandoned, and abandoned land helps nobody.
People care also means the knowledge doesn't stay locked up. I feel strongly about this. Ecological knowledge that only reaches other ecologists is knowledge wasted. The whole point is to get it into the hands of regular people who want to help. So people care includes teaching, sharing, and making sure the person who can't afford the course still gets in the door.
Fair share
Take what you need, and return the surplus. Some people phrase it as setting limits to consumption and redistributing the extra.
A healthy fruit tree makes more fruit than you can eat. A healthy garden makes more seed than you can plant. A working system produces surplus, and the ethic says that surplus should flow back out, to your neighbors, to the wild, to the next season's soil, to people starting out with less than you had.
This is where permaculture stops being just gardening and starts being culture. The forest doesn't hoard. A big tree drops its leaves and feeds the whole soil community, and when it finally falls it becomes food and habitat for decades. That's fair share, and the forest has been practicing it a lot longer than we have.
How the three work together
The ethics aren't a menu. You don't pick one. A good design honors all three, and when they seem to conflict, you sit with the conflict instead of ignoring it.
Say you could clear a patch of scrubby native regrowth to plant a bigger vegetable garden. More food, more people care. But that scrub is habitat and it's building soil and holding a slope, so clearing it costs you earth care. The ethics force you to actually weigh it rather than just grabbing the yield. Maybe you garden somewhere else. Maybe you keep the garden small and let the scrub grow up into something richer. The tension is the point. It makes you design instead of just taking.
Try this: Take any decision you're facing on your land, real or imagined. Run it past all three ethics out loud. Does it care for the earth? Does it care for people? Does it deal honestly with the surplus? Notice which ethic you tend to skip. That's usually where your blind spot is.
Chapter 3: The design principles
The ethics tell you what you're aiming for. The principles tell you how to think while you design. They're not rules to obey. They're prompts, a set of questions to hold up against your site until the right design starts to show itself.
There are two well-known sets. David Holmgren wrote twelve principles that most modern courses teach. Bill Mollison framed his own set earlier, with more of an ecological engineering flavor. They overlap heavily. I'll give you Holmgren's twelve in full, then Mollison's key additions, because between them you get the whole toolkit.
Holmgren's twelve principles
1. Observe and interact. Before you touch anything, watch. Where does water pool after rain? Where does frost sit? Which corner does the dog choose to nap in, and why? A season of watching saves you years of fixing mistakes. This is the first principle because it's the one people skip, and skipping it is the most expensive error in permaculture.
2. Catch and store energy. Energy pours across your site constantly. Sunlight, rainwater, wind, the nutrients in falling leaves. Most of it leaves again just as fast. Design catches it and holds it. A pond stores water. A wall stores heat. A tree stores carbon and sun. Healthy soil stores everything. The wealth of a system is how much energy it can catch and keep.
3. Obtain a yield. You have to get something back, and soon enough to keep going. A design that promises abundance in fifteen years but nothing this season won't survive contact with real life. Get some quick yields early, even small ones, while the slow ones mature. A row of beans this summer while the fruit trees grow.
4. Apply self-regulation and accept feedback. The land is always talking. Yellow leaves, standing water, a pest outbreak, a crop that thrives or sulks. That's feedback, and it's telling you what your design got right and wrong. Build systems that self-correct, and pay attention when the site pushes back instead of forcing your plan through.
5. Use and value renewable resources and services. Favor the resources that renew themselves and the work that living things do for free. A chicken turns kitchen scraps into eggs and fertilizer and turns your compost pile for you. A nitrogen-fixing plant makes fertilizer out of air. Reach for the living solution before the bought one.
6. Produce no waste. In nature there's no such thing as waste. Every output is an input somewhere. Design so the "waste" from one part becomes food for another. Kitchen scraps to the compost or the chickens. Greywater to the fruit trees. Prunings to mulch or mushroom logs. Waste is just a resource you haven't found a use for yet.
7. Design from patterns to details. Start big and general, then zoom in. Get the water flow, the sun, the access, and the broad zones right first. Then place the individual beds and plants inside that. People love to start with the fun details, the exact tomato variety, and never sort out the pattern the whole site needs. Pattern first. Always.
8. Integrate rather than segregate. Put things where they help each other. The classic industrial habit is to separate everything, all the chickens here, all the trees there. Nature integrates. The chickens under the trees eat the fallen fruit and the pest larvae, fertilize the roots, and get shade in return. Every element should sit next to the ones it can work with.
9. Use small and slow solutions. Start small. Learn on a scale where mistakes are cheap. A garden bed teaches you what a farm will need, and it teaches you for the price of a weekend, not a mortgage. Small and slow systems are easier to maintain, easier to fix, and they fit the land better than big fast ones imposed from above.
10. Use and value diversity. Diversity is insurance. A field of one crop can be wiped out by one pest or one bad week of weather. A polyculture spreads the risk, and the different species support each other. This runs deep in both permaculture and restoration. The more kinds of living things, the more stable and productive the whole.
11. Use edges and value the marginal. The edge, where two systems meet, is the richest place of all. The margin of a pond, the border of forest and meadow, the space between. More species live there, more happens there. Good design multiplies useful edge instead of erasing it, and it takes a second look at the marginal spots and odd corners everyone else writes off.
12. Creatively use and respond to change. Change isn't the enemy of a design. It's the medium you work in. Trees grow and cast new shade. Climate shifts. A storm knocks a gap in the canopy and a whole new community rushes in. The skilled designer expects change, reads it, and steers it. Succession, the natural march from bare ground toward forest, is the biggest change of all, and you can work with it or fight it. Work with it.
Mollison's principles, the ones worth adding
Mollison framed his principles around how energy and function move through a system. A few of them sharpen the picture Holmgren gives, and they're worth carrying with you.
Relative location. It's not what elements you have, it's where you put them in relation to each other. The water tank uphill of the garden. The greenhouse against the house wall. Placement is most of design.
Each element performs many functions. Every thing you place should earn its keep several times over. A pond gives you water, but also fire protection, aquaculture, reflected light for a north wall, habitat for frogs that eat pests, and a place to cool off. If a pond only holds water, you haven't finished designing it.
Each important function is supported by many elements. Turn it around. Any need that really matters, like water or food, shouldn't hang on a single source. Catch rain, dig a well, build a pond, and store some. If one fails, you don't go thirsty. Redundancy for the things that count.
Efficient energy planning: zones and sectors. Arrange the site by how often you visit each part and by the forces that come in from outside. The herbs you cut daily go by the kitchen door. The woodlot you visit twice a year goes far out. This is important enough that it gets its own chapter later.
Use biological resources. Let living things do the work wherever they can. Ducks for slugs, comfrey for fertilizer, legumes for nitrogen, deep-rooted plants to break up hardpan. Biology is cheaper and more resilient than machinery and chemistry.
Energy cycling. Catch nutrients and energy and cycle them on site before they leave. The leaves that fall should feed your soil, not fill a municipal truck.
Accelerating succession. You can speed up the natural progression from bare ground to mature system. Restoration does this constantly. Plant the pioneers that would have come anyway, add the soil life, and you compress decades into years. I've watched it happen on hard limestone.
The problem is the solution. This one's an attitude more than a mechanism, and it's the most useful thing Mollison ever said. The thing you're cursing is usually a resource you're misreading. Too much water becomes a pond and an aquaculture system. Too many weeds become mulch and compost and a sign of what your soil needs. A steep windy slope becomes your energy site. Turn the problem around and look for the yield hiding in it.
How to actually use the principles
Don't memorize them like a test. Pin them somewhere and run your design past them, one at a time, when you're stuck. You've placed the vegetable garden. Now walk the list. Did I observe first? Am I catching energy here or letting it run off? Will this yield something soon? Does it sit next to things it can work with? Is there an edge I could be using?
Nine times out of ten, one of the principles will show you something you missed. That's what they're for. They're a checklist for seeing, not a set of commandments.
Try this: Pick one principle that snagged your attention, maybe "the problem is the solution." Walk your site and find one problem, the soggy corner, the windy gap, the weedy patch. Write down three ways that problem could become a resource. You don't have to build any of them. You're training the eye.
Part 2: Reading the land
Chapter 4: Observation and the design process
Everything good in permaculture starts with observation, and almost everything bad starts with skipping it.
I mean this literally. The single most common mistake I see, on permaculture sites and restoration sites both, is someone arriving with a plan already fixed in their head and imposing it on a piece of land they haven't watched. They dig the pond in the wrong spot. They plant the orchard where the frost sits. They fight the site for years over things a season of watching would have told them for free.
So before the design, there's the seeing. This chapter is about how to see, and how to turn what you see into a plan.
Watch through a full year if you can
Land changes with the seasons, and the important things often show up only once a year. Where the snow drifts. Where the spring meltwater runs. Which slope bakes dry in August and which stays green. Where the first frost settles in the fall. You can't know any of that from a summer afternoon.
If you have a year before you commit, take it. Walk the land in every season and every weather. Go out in the heaviest rain you can, because that's when the water shows you exactly what it does, and water is the thing that shapes everything else. Go out at dawn and at dusk when the animals move. Go out in the wind and feel where it funnels and where it's still.
Most people won't wait a year, and I understand that. Life's short and you want to start. So if you can't watch for a year, at least watch hard for a few weeks, and design in a way you can adjust. Small and slow. Put in the things you're sure of, and leave the big irreversible moves until the land has taught you more.
The sit spot
Here's a practice I'll come back to, because it runs through everything I teach, the fieldwork and the inner work both. Pick a spot on your land. Go sit there. Same spot, regularly, for at least fifteen or twenty minutes, doing nothing but paying attention.
Don't take notes at first. Just watch and listen. Which birds come, and when, and what sets them off. How the light moves. What the wind does. Where the insects are working. After a few weeks of this you'll know that piece of ground in a way no survey can give you, because you'll have watched it be alive.
This isn't mysticism, though I won't pretend the stillness isn't part of why I do it. It's data collection of the richest kind. The land is running a conversation all the time, and the sit spot is how you learn to hear it. Twenty years of watching taught me more than any book, and it started with sitting still.
Map what you find
As you observe, start putting it on paper. You don't need to be an artist. A rough sketch of your site from above, with the boundaries, the buildings, and the big trees, gives you a base. Then layer on what you learn.
Draw the water. Where it enters, where it flows, where it pools, where it leaves. Draw the sun, the arc it makes in summer and winter, and the shadows the buildings and trees throw. Draw the wind, the hot dry winds and the cold ones, with arrows for the directions they come from. Draw the slope, the high ground and the low, the steep and the flat. Mark the frost pockets, the wet spots, the dry spots, the views you want to keep and the ones you want to block.
By the time this map is full, the design half makes itself. You'll look at it and see that the water tank belongs up here, the garden belongs in that sheltered sunny pocket, the windbreak belongs along that edge. The map turns scattered observations into a picture you can design from.
The design process, step by step
There's no single official method, but most good permaculture design moves through the same rough sequence. I'll give it to you plainly.
First, observe and gather. The land, as above. Also yourself. What do you actually need and want from this place? Food, income, beauty, privacy, a place for kids, habitat for wildlife? Be honest. A design that ignores the people never gets maintained.
Second, analyze. Look at your map and your needs together. What resources does the site already offer? What are its limits? What forces come in from outside, sun, wind, water, fire, noise, neighbors? This is where you name the site's real character instead of the one you wished it had.
Third, design. Now you place things. Broad patterns first, the zones and the water and the access, then the details inside them. This is the heart of the work, and the rest of this manual is mostly tools for doing it well.
Fourth, implement. Build it, but in stages, smallest and most certain first. Don't try to do the whole site in one heroic season. You'll exhaust yourself and lock in mistakes.
Fifth, watch and adjust. The land responds. You read the feedback and you change the design. This never really ends, and it shouldn't. A living design keeps evolving, same as the system it's part of.
A word on analysis of elements
Here's a simple tool that makes the placement step much easier. For any element you want to add, a chicken coop, a pond, a fruit tree, write down four things. What it needs. What it produces. Its natural characteristics, or behaviors. And what it is.
Take a chicken. Needs: food, water, shelter, grit, other chickens. Produces: eggs, meat, feathers, manure, warmth, foraging, scratching. Characteristics: scratches the ground, eats insects and greens, flies a little, afraid of hawks.
Now the design almost writes itself. The chicken produces manure and the garden needs manure, so put them close. The chicken needs shelter and the orchard produces shade and fallen fruit, so run the chickens under the trees. The chicken is afraid of hawks, so you want some cover. You connect the needs of each element to the products of another, and the connections tell you where things go. This is how you integrate rather than segregate in practice.
Try this: Do the element analysis for one thing you want on your site. List its needs, its products, its behaviors. Then look at what's already there and find one match, one need you can meet or one product you can use. That match is a placement decision, and you just made it from observation instead of guesswork.
Chapter 5: Patterns in nature
Nature repeats a small set of shapes over and over, at every scale, because they work. Learn to see them and you get a design vocabulary that's been tested for a few billion years.
Mollison built a whole chapter of his manual around pattern, and it can get abstract fast. I'll keep it grounded. The point is practical. When you don't know how to arrange something, look at how nature arranges the same kind of flow, and copy the pattern.
The patterns that keep showing up
Branching. Rivers, trees, veins in a leaf, your own lungs and blood vessels. Wherever something needs to collect from or distribute to a wide area through channels, you get branching. Water gathers from many small gullies into fewer bigger streams into one river. A tree spreads from one trunk into many branches into thousands of leaves. When you're moving water or people or nutrients across a site, branching is usually the efficient shape.
Spirals. Shells, sunflower heads, ferns uncurling, water going down a drain. A spiral packs a long path into a small space and it handles flow gracefully. The herb spiral is the famous permaculture example, a little mound built as a spiral so you get sun and shade, wet bottom and dry top, all in a couple of square meters by the kitchen door.
Lobes and edges. Coastlines, the margins of a leaf, the edge of a pond. Wavy, crenellated edges pack more boundary into the same length. And boundary, edge, is where the life is. A pond with a wavy shoreline has far more productive margin than a round one the same size.
Nets and packing. Honeycomb, cracked mud, the cells in a leaf. Hexagons and packed shapes fill space with the least material. Useful when you're thinking about how to tile a space efficiently.
Scatter and flow. The way seeds disperse, the way water sheets across a plain, the way a flock moves. Some things spread out, some things channel. Reading which is which on your land tells you a lot.
The one that matters most for design: edge
I'll say it plainly because it's the pattern with the biggest payoff. The edge between two systems is more productive than either system alone.
Think about where the forest meets the meadow. You get the forest species, the meadow species, and a set of species that live only in the transition, plus all the animals that use both. More light than deep forest, more shelter than open field. Ecologists call it the edge effect, and it's real and measurable. The margin of a pond, the shoreline of a lake, the hedgerow between two fields. These narrow bands hold a wild abundance of life.
Good design multiplies useful edge. A straight pond edge is a wasted opportunity. Give it lobes and bays and you double or triple the productive margin. A single big field is less alive than the same area broken by hedgerows. A keyhole garden bed, shaped so a path curls into it, gives you more reachable growing edge than a plain rectangle.
There's a limit, of course. Edge everywhere means nothing but edge, and some species need the deep interior, the middle of the woods where it's dark and still. So don't chop your forest into confetti chasing edge. But wherever you're designing a boundary, ask whether more edge would mean more life and more yield. Usually it does.
Try this: Find a natural edge near you, a woodland border, a pond margin, a hedgerow. Stand at it for ten minutes and count how many kinds of living things you notice, then walk twenty steps into the middle of either system and count again. Feel the difference in your own observation. That's the edge effect, and now you'll design for it.
Chapter 6: Climate and microclimate
Climate is the biggest hand shaping what will grow and how you should build. You can't change your climate, but you can read it, work with it, and bend the little climates on your own site quite a lot.
I've designed in two climates about as different as they come. Southern Ontario, cold temperate, hard winters, four real seasons, deep frost. And the northern Yucatan, hot tropical, a wet season and a dry season, no frost ever, sitting on porous limestone that drinks the rain straight down. What works in one would fail in the other. So I've had to learn climate from the ground up twice, and the lesson both times was the same. Design for the climate you actually have, not the one in the book you're reading.
Read your macroclimate first
Your macroclimate is the big regional pattern. Learn these things about yours before anything else.
How cold does it get, and for how long? The depth and length of winter, or the dry season, sets what can survive. Growers use hardiness zones as shorthand for winter cold, and they're a useful start, though they only tell you about cold, not heat or drought or humidity.
How does the rain fall? Total amount matters less than timing. A place with a long dry season needs completely different design from a place with rain spread evenly, even if they get the same yearly total. The Yucatan gets plenty of rain, but it comes in a few months and then stops hard, and the limestone lets it vanish, so the design problem is storage, not supply.
How hot does it get, and how humid? Heat and humidity together decide your pests, your diseases, your comfort, and what rots versus what keeps.
Where does the sun sit, summer and winter? In the temperate world the sun is low in winter and high in summer, and that difference drives a lot of building and planting decisions. Near the equator the sun is nearly overhead most of the year, which changes everything about shade and orientation.
Then work the microclimates
Here's the good news. Within your one macroclimate, your site holds many small climates, and you have real power over those. A microclimate is a pocket that's warmer, cooler, wetter, drier, or more sheltered than the general area. Learn to find them and make them, and you can grow things your region supposedly can't, and protect things it would otherwise kill.
What makes a microclimate?
Slope and aspect. Which way a slope faces changes everything. In the northern hemisphere a south-facing slope catches far more sun and runs warmer and drier. A north-facing slope stays cool and moist and shaded. South of the equator it flips. A warm sunny slope is where you push your tender crops and your early spring growth. Match the plant to the aspect and half your work is done.
Cold air and frost pockets. Cold air is heavy. It flows downhill like water and pools in low spots and behind barriers. That low corner of your land, or the uphill side of a solid fence across a slope, will be a frost pocket, colder than everything around it, and it'll kill frost-tender plants first. Knowing where the cold air pools tells you where not to put the orchard, and where you might put the thing you want to keep dormant longer.
Thermal mass. Water, stone, masonry, and earth soak up heat during the day and give it back slowly at night, steadying the temperature nearby. A pond, a stone wall, the south face of a building. Plant against that mass and you buy a few degrees of frost protection and a longer season. Some of the oldest garden walls in the world exist for exactly this reason.
Wind and shelter. Wind dries things out, knocks plants around, and steals heat. A windbreak, a hedge, a wall, a line of trees, creates a sheltered pocket downwind that's warmer, calmer, and moister. A good windbreak shelters a distance of several times its own height. But get it wrong and a solid barrier makes damaging turbulence, so windbreaks want to be semi-permeable, filtering the wind rather than blocking it dead.
Water bodies. A pond or lake moderates the air around it, cooler in the heat, warmer in the cold, and it bounces extra light onto nearby plants and walls. Old growers planted fruit against a south wall with a pond in front to catch that reflected sun.
Stacking microclimate tricks
The skill is combining these. Picture a classic sun trap. A slope facing the sun, curved like a horseshoe opening toward it, with a wall or dense hedge around the back and sides, and thermal mass, a pond or stone, inside the curve. That pocket gathers sun, blocks cold wind, and stores heat. It can run warm enough to grow things well outside your region's normal range. You built a warmer climate on purpose, out of slope, shelter, and mass.
You can go the other way too, making a cool shaded moist pocket for the plants that want it, using shade, a north aspect, and a water source. In a hot climate that's often the harder and more valuable trick.
Try this: Walk your site on a cold morning or a hot afternoon and find the microclimates that already exist. The warm sheltered corner where the snow melts first, or the plants leaf out early. The cold low pocket. The wind tunnel between the buildings. Mark them on your map. You'll build your design around them, tender things in the warm pockets, tough things in the harsh ones.
Chapter 7: Zones and sectors
This is the tool that turns a pile of good ideas into a working layout. Zones and sectors answer the question everyone gets stuck on: where does everything actually go?
Two separate ideas, and they work together. Zones are about you and how often you visit. Sectors are about the outside forces that come onto your site. Get both onto your map and placement stops being guesswork.
Zones: organize by how often you go there
The insight is simple. The things you tend often should be close. The things you tend rarely can be far. Arrange your site in rough bands by frequency of visit, and you save yourself thousands of unnecessary steps over the years, and you stop neglecting the things that got put too far away.
Permaculture numbers the bands zero through five.
Zone 0 is the house, or the center of activity. The design starts here because this is where you are, and everything radiates out from it.
Zone 1 is closest, just outside the door. This is the most intensive, most visited ground. The kitchen herbs, the salad greens, the things you pick daily and want to cut and carry in without putting your boots on. It gets the richest soil and the most attention because you're always right there.
Zone 2 is a bit further. Main vegetable beds, small fruit, the compost, maybe a few chickens. You visit most days but not every hour. Still intensive, still well tended, just not underfoot.
Zone 3 is the farm zone, if you have the space. Main crops, larger fruit and nut trees, bigger livestock, the staples you don't fuss over daily. You visit weekly or so.
Zone 4 is semi-wild. Managed lightly. Woodlot for timber and firewood, foraging, grazing, hardy trees that mostly look after themselves. You visit occasionally.
Zone 5 is the wild. You don't manage it at all. You leave it alone and you go there to watch and learn. This is the zone where restoration and permaculture shake hands, the piece you let be its wild self, habitat for the creatures that keep the whole system in balance. I think every design should have a zone 5, even a small one, and I'll go further and say it might be the most important zone. It's your teacher and your reference, the reminder of what the land does when you take your hands off.
Now, the zones aren't neat rings on a map. Real sites are lumpy. The zone follows where you actually walk. A path to the barn creates a finger of higher-zone activity reaching out along it. The point isn't tidy circles. It's matching the intensity of care to the frequency of visit, so nothing important ends up too far to look after.
The commonest beginner mistake this fixes: the herb garden planted at the bottom of the yard, which sounds fine until it's raining and dark and you're not walking down there, so you don't, and the herbs go to weeds. Put them by the door. Zone 1. You'll use what's close and neglect what's far, so design around that truth instead of against it.
Sectors: organize by what comes in from outside
Sectors deal with the energies that arrive on your site whether you like it or not. Sun, wind, rain, fire, flood, noise, the view of the ugly thing next door, the headlights of the road. You can't move these. But you can place your elements to catch the good ones and block or deflect the bad ones.
On your map, draw the sectors as wedges radiating from your center, showing which direction each force comes from.
Where does the summer sun come from, and the low winter sun? You want winter sun reaching the house and the greenhouse, so keep that wedge open. You might want to block or filter the fierce summer afternoon sun, so that's where a deciduous tree earns its place, shading in summer and dropping its leaves to let winter light through.
Where do the cold winter winds come from? Block that wedge with a windbreak. Where do the hot dry winds come from? Same. Where does the pleasant summer breeze come from? Keep that one open so it can cool the house.
If you're in fire country, where would a fire come from? That wedge wants defensible design, ponds, low-flammable planting, no fuel funneling toward the house. Where does the noise or the headlight glare or the bad view come from? Screen it.
Where does your water arrive? If runoff sheets onto your land from higher ground, that's a sector too, and you can catch and use that free water instead of letting it cut a gully.
Zones and sectors together
Lay both over your map and the design tightens fast. Zones tell you how far out to place things by how often you'll tend them. Sectors tell you how to angle and shelter things against the forces coming in. Between them they answer most placement questions before you've planted a thing.
An example to make it concrete. You want a greenhouse. Zones say keep it close, zone 1 or 2, because you'll visit it constantly. Sectors say put it where the low winter sun can pour in, shelter its cold-wind side, and maybe back it against the house wall for shared warmth and thermal mass. Two tools, one good location, and you found it on paper before lifting a shovel.
Try this: Take your site map and draw the zones as rough bands based on how often you'd really visit each area, honestly, not how often you imagine an ideal version of yourself would. Then draw the sectors, arrows for sun, wind, water, and any nuisance coming in from outside. Sit with the finished map. I'd bet good money that at least one thing you were planning to put somewhere just moved.
Part 3: The elements
Chapter 8: Water
Water is the first thing to design and the thing everything else depends on. Get the water right and the rest follows. Get it wrong and you'll fight the site forever.
I put water before soil, before plants, before buildings, because water shapes all of them. It carves the land, it decides what grows, it builds or destroys soil, and it's the one resource that, once it leaves your site, is gone until the next rain. So the whole game is this. Slow it, spread it, sink it. Slow the water down so it doesn't cut and rush away. Spread it out across the land. Sink it into the ground where soil and roots can hold it.
Start at the top and think about the whole flow
Water arrives at the highest point of your land and moves down. Every decision about it is easier if you start at the top and follow the drop.
Rain lands, and one of a few things happens. It runs off the surface, taking soil with it. It sits and evaporates. Or it soaks in and gets stored in the soil and rock for plants and springs to use later. Bare, compacted, sloping ground sends water racing off, and that runoff is your topsoil leaving. Living, spongy, covered ground drinks it in. So a huge amount of water design is really soil and cover design, which is why the two chapters sit next to each other.
Your job as a designer is to intercept the water high up, while it's still spread out and moving slowly, and give it every chance to soak in on the way down. The higher you catch it, the more of your land it can serve by gravity alone, no pumping.
Swales: the classic soak-it-in earthwork
A swale is a shallow ditch dug dead level along the contour of a slope, usually with the dug soil mounded on the downhill side. Because it's level, water can't run along it. It just spreads out in the ditch and sinks straight down into the ground, recharging the soil below and feeding whatever you plant on that mound.
Swales are the signature permaculture earthwork, and they're genuinely useful on the right site. A dry slope where you want to grow trees is the perfect case. The swale catches the runoff that used to race past, holds it, and sinks it right where the tree roots can reach, and the tree line along the mound turns into a green band across a dry hillside.
But hear the warning, because this is where enthusiasm hurts people. A swale sinks water. On a site that's already too wet, on heavy clay that won't drain, or on a slope steep or unstable enough that saturating it could slide, a swale is the wrong tool and can do real harm. I said it in the first chapter and I'll say it again. The technique is not the point. The judgment is. Dig swales where you need water to soak into dry ground, not where you're already drowning.
Ponds and dams: storage you can see
A pond stores water out in the open where you can use it, and it does far more than hold water. Remember Mollison's principle, each element performs many functions. A well-placed pond gives you irrigation storage, aquaculture, habitat for the frogs and dragonflies that eat your pests, fire protection, a cooler moist microclimate, reflected light for nearby plants, and a place for people to sit and kids to catch tadpoles.
Place ponds high in the landscape where you can and let gravity move the water down to where it's needed. Shape the edges with lobes and bays, not a plain circle, to multiply that rich margin where most of a pond's life lives.
I've built aquatic systems, and I'll tell you one thing we did because it shows how ordinary the tricks can be. To plant into a pond, into water, where you can't just push a plant into soft mud from the bank, we rolled the seeds and young plants into balls of clay. 60,000 of them. You toss the clay ball out, it sinks, the clay holds it on the bottom against the water movement, and the plant grows up out of it. Simple, cheap, and it worked. That's the spirit of the thing. Look at the problem, find the material at hand, solve it without buying a kit.
Keyline: reading a slope's own logic
There's a water design approach worth knowing by name, called keyline, developed by an Australian named P. A. Yeomans in the mid twentieth century. The short version. Every valley and ridge on a slope has a geometry, and left alone, water naturally concentrates in the valleys and the ridges stay dry. Keyline planning uses careful, slightly off-contour plowing and layout to move water the other way, gently carrying it from the wet valleys out toward the dry ridges, spreading moisture evenly across the whole slope instead of letting it gather and cut.
You don't need the full system to use the insight. Just understand that a slope has a pattern of wet and dry built into its shape, and good design reads that pattern and evens it out, pulling water from where it collects toward where it's short.
Catch it off your roof, too
The simplest water catchment most people own is a roof. A roof sheds an enormous amount of clean water in a single storm, and most of it's wasted down a drain. Gutters to a tank, or gutters to a garden, or gutters to a pond, and you've caught a resource that was falling on you free the whole time. In a place with a long dry season, roof catchment into storage can be the difference between a garden and bare dirt.
The greywater idea
The water that leaves your sink, shower, and washing machine, greywater, is a resource, not waste. Run through a simple planted bed or straight out to fruit trees, that daily flow can irrigate a surprising amount of growth. Keep it simple, keep it moving so it doesn't go stagnant, use plant-friendly soaps, and send it to the roots of thirsty trees rather than onto things you eat raw. Free irrigation that you were already producing and throwing away. That's produce-no-waste in your own plumbing.
Try this: Next heavy rain, put on a coat and go watch your land. Follow the water. See where it enters, where it runs, where it cuts, where it pools, where it leaves. Take photos or scratch it on your map. That single wet walk will teach you more about your water than any amount of dry planning, because the water shows you exactly what it does instead of what you assume.
Chapter 9: Soil
Soil is alive, and once you understand that, most of the confusion about fertilizer and chemicals falls away. Feed the life in the soil, and the soil feeds the plants. That's the whole philosophy, and it's backed by hard science.
A single handful of healthy soil holds more living creatures than there are people on earth. Bacteria, fungi, protozoa, nematodes, mites, worms, and root tips, all trading with each other in a constant web. That web is what turns dead rock and dead leaves into the crumbly dark stuff plants grow in. Kill it, and you're left with lifeless dust that needs a bag of chemicals every season to produce anything. Feed it, and it builds fertility year after year on its own.
What soil actually is
Soil is a mix of four things. Mineral particles, from the slow breakdown of rock, in sizes from sand down through silt to clay. Organic matter, the remains of living things in every stage of decay. Water, in the spaces between. And air, in those same spaces, because roots and soil life need to breathe.
The mineral part sets your soil's basic texture. Sandy soil drains fast and dries out, gritty to the touch. Clay soil holds water and nutrients but packs tight and drains slow, sticky when wet and hard when dry. Silt sits between. Most soils are a blend, and the blend affects how you water, when you can work it, and what will thrive. You can't easily change your soil's texture, it's a lot of rock, but you can transform how it behaves by adding the one thing you do control. Organic matter.
Organic matter is the master key
Organic matter, decaying life, is the thing that makes everything work. Add it to sandy soil and it holds water and nutrients that would've drained away. Add it to clay and it opens the tight structure so water and air and roots can move. It feeds the whole soil food web. It's the closest thing to a universal soil fix there is, and you make it for free out of what most people throw away.
The dark, crumbly, sweet-smelling end product of decayed organic matter is humus, and it's the treasure. Humus holds water like a sponge, grips nutrients so rain can't wash them away, and gives soil that loose open structure roots love. Building humus is soil building. Everything below is a way to do it.
Compost: making soil on purpose
Compost is decomposition you manage. You pile up organic materials, the soil life goes to work, and in a few months you've got rich dark humus to feed your beds.
The recipe is simpler than people make it. You need a rough balance of two things. Browns, the dry carbon-rich stuff, dead leaves, straw, cardboard, wood chips. And greens, the wet nitrogen-rich stuff, kitchen scraps, fresh grass, green prunings, manure. Roughly more browns than greens by volume. Layer them, keep the pile damp like a wrung-out sponge, and give it air by turning it or building it loose. The life does the rest, and a well-built pile heats up as the bacteria work, which tells you it's cooking.
If that sounds fussy, it isn't in practice. A pile of leaves and kitchen scraps will become soil whether you fuss or not. The management just makes it faster and hotter. Even the laziest heap gets there in the end, because rot is what nature does with everything eventually.
Mulch: the lazy move that pays most
If you do one thing for your soil, cover it. Bare soil is a wound. Nature never leaves it bare, and neither should you. Mulch is any material you lay over the soil surface, straw, leaves, wood chips, compost, even cardboard, to cover and protect it.
What mulch does is almost unfair for how little effort it takes. It holds moisture in by stopping evaporation, so you water far less. It smothers weeds by blocking their light. It keeps the soil cooler in heat and warmer in cold, steadying the temperature the roots and soil life prefer. It feeds the soil as it slowly breaks down from below. And it stops rain from pounding the surface into a hard crust and washing your soil away.
Covering the ground is the single highest-return, lowest-effort thing a beginner can do. A well-mulched garden half tends itself.
Don't dig it to death
Old-fashioned gardening says dig deep and turn the soil every year. We've learned that constant digging harms the soil life. It shreds the fungal networks, burns up organic matter, brings weed seeds to the surface, and destroys the structure the soil worked to build. There's a whole approach called no-dig, or no-till, built on leaving the soil undisturbed and building fertility from the top with compost and mulch, the way a forest floor builds itself, from the surface down, layer by layer, without anyone ever turning it.
You don't have to be rigid about it. Sometimes you need to loosen compacted ground to get started, or dig a planting hole. But the default should be to disturb the soil as little as you can and feed it from the top. Let the worms and roots do the tilling. They're better at it than you are, and they work for free.
Soil life you can recruit
Two players deserve a special word.
Earthworms are your tillage crew and fertilizer factory in one. They eat their way through the soil, mixing organic matter down, opening channels for air and water, and leaving behind castings richer than the soil they ate. A soil full of worms is a healthy soil, and you build their numbers by feeding them, mulch and organic matter, and by not poisoning them with harsh chemicals or shredding them with the spade.
Mycorrhizal fungi are the quieter miracle. These fungi partner with plant roots, threading out through the soil far beyond where the roots can reach, gathering water and nutrients and trading them to the plant in exchange for sugars. Most plants grow better with them than without. You protect and encourage them the same way, by not tilling, not fumigating, and keeping living roots and organic matter in the ground. Healthy undisturbed soil grows its own fungal network, and that network feeds your whole system.
Try this: Dig one small hole, a spade's depth, in a spot you're thinking of planting. Look at the soil. Is it dark or pale? Does it crumble or clump or run through your fingers? Can you find a worm? Smell it, good soil smells sweet and earthy. You're not testing for a grade. You're meeting the living system you're about to work with, and learning where it stands so you know what to feed it.
Chapter 10: Trees, forests, and the food forest
Trees are the backbone of a mature permaculture system, and if you understand what a tree does beyond growing fruit, you understand why. A tree does far more than hand you something to pick. It catches energy, builds soil, moves water, shelters everything around it, and holds a whole community of life.
What a tree does for the system
A single mature tree runs an enormous amount of work. Its leaves catch sunlight and turn air and water into growth, and every autumn, in a deciduous tree, they fall and feed the soil below. Its roots reach deep, breaking up hard subsoil, drawing up minerals from far down and depositing them at the surface when the leaves drop. It shelters the ground from beating sun and rain and wind, creating a cooler, moister microclimate underneath. It pulls water up from deep and releases it as vapor, and forests of trees together actually help make rain. It holds soil against erosion with its roots. And it houses birds, insects, fungi, and countless other creatures, many of which do work you want done, like eating pests and pollinating.
When you plant a tree, you're not adding one element. You're adding an entire small ecosystem and a hundred years of future function. That's why trees anchor the design, and why the patient work of getting them established pays back longer than anything else you'll do.
The food forest: farming like a forest grows
The food forest, sometimes called a forest garden, is one of permaculture's best ideas, and it comes straight from copying how a natural forest is built. A forest doesn't grow in a single flat layer. It stacks. Tall trees over smaller trees over shrubs over herbs over ground plants over roots, with climbers running up through all of it. Every layer catches light the layer above missed, and every niche is filled.
A food forest does the same thing, but you choose plants that feed you or do useful work. People usually describe it as seven layers.
The canopy, your tall trees, large fruit and nut trees. Below them the understory, smaller fruit trees that tolerate some shade. Then the shrub layer, currants, berries, and the like. The herb layer, your vegetables, herbs, and useful perennials. The ground cover, low spreading plants that carpet the soil and keep it covered. The root layer, what grows underground, roots and tubers and bulbs. And the vertical layer, climbers and vines running up the trunks and trellises to use the vertical space.
Stacked like this, a small piece of ground produces far more than the same area planted flat, because you're harvesting sunlight at every height instead of just one. And once it's established, a food forest is close to self-maintaining. The trees shade out weeds, the fallen leaves mulch the ground, the deep roots find their own water and minerals, and the whole thing holds together the way a wild forest does, without you feeding and watering it every week.
It takes patience. A food forest is a slow yield, years to maturity. So you interplant fast things among the slow, annual vegetables and quick shrubs in the open years while the trees are small, getting a harvest now while the forest grows toward the harvest of a lifetime. Obtain a yield and use small and slow solutions, both principles, working together in one planting.
A restoration note on trees
Here's where my restoration side speaks up, and it's worth your attention. When you choose trees, choose well, and lean hard toward species that belong in your region. A native tree comes with its whole web already attached, the insects that evolved to eat its leaves, the birds that eat those insects, the fungi that partner its roots. An exotic tree often stands alone, feeding little of the local life, and some exotics escape and become invasions that choke out everything native for miles.
You can build a productive food forest mostly or entirely from plants suited to your place, and it'll be richer for it. Where you do reach for a non-native, a fruit tree from another continent, do it with your eyes open. Know whether it can spread and cause harm, and if it can, don't plant it just because a book listed it. There's almost always a well-behaved alternative that does the same job and feeds the neighborhood of wild creatures too. That single habit keeps your permaculture from quietly becoming the very problem restoration spends its life undoing.
Try this: Go into the nearest patch of real woodland and look up, then down, slowly. Count the layers. The tall trees, the shorter ones, the shrubs, the plants on the floor, the things climbing the trunks. Notice how the light filters down and how little bare ground there is. You're looking at the model. Your food forest is an attempt to build that same stacked abundance out of plants that also feed you.
Chapter 11: Plants, guilds, and polycultures
The way you combine plants matters as much as which plants you pick. Nature never grows one thing alone in a bare field. It grows communities, dozens of species tangled together, each doing something for the others. Copy that, and your garden gets healthier, more productive, and far less work.
Polyculture beats monoculture
A monoculture is a single crop grown alone across a space. It's how industrial farming works, and it's fragile. One pest that likes that crop finds an endless buffet and explodes. One disease sweeps straight through. The soil, feeding the same plant over and over, gets depleted in the same way every season. So monoculture demands constant defense, sprays and fertilizers, just to keep standing.
A polyculture is many crops grown mixed together, and it behaves like a natural community. A pest that finds one plant has to search for the next through a crowd of others it doesn't want. Diseases struggle to spread through mixed planting. Different plants feed at different depths and give back different things, so the soil stays balanced. And the mix fills every niche, leaving no bare ground for weeds. More yield, more stability, less work. That's use and value diversity made real in a garden bed.
Guilds: plants that work as a team
A guild is a small, deliberate community of plants chosen to support each other, built around a central element, usually a tree. It's polyculture with intention. You pick plants whose needs and gifts fit together so the group thrives with little help.
Think about a young fruit tree and what it needs. It needs nitrogen, so you plant nitrogen-fixing plants nearby, legumes and certain shrubs that pull nitrogen from the air and feed it into the soil. It needs its deep minerals cycled, so you plant deep-rooted dynamic accumulators like comfrey that mine nutrients from far down and release them when you cut their leaves as mulch. It needs pollinators and pest-eaters, so you plant flowers that draw bees and the wasps and hoverflies that hunt aphids. It wants its root zone protected and the weeds kept down, so you plant ground covers that carpet the soil and bulbs like garlic and daffodil that ring the trunk and discourage grass and pests. It wants the soil kept alive and mulched, which the whole guild does by dropping leaves and shading the ground.
Put that together and you've got a fruit tree ringed by a supporting cast, each member feeding the tree, the soil, or the beneficial insects. The classic teaching example is the apple guild, but the idea works around any anchor plant. Design the team, plant it once, and it largely runs itself.
The three sisters, an older wisdom
The most famous guild on this continent isn't from permaculture at all. It's from Indigenous agriculture, and it long predates any of the ideas in this book. Corn, beans, and squash grown together, the three sisters. The corn grows tall and gives the beans a pole to climb. The beans fix nitrogen from the air and feed the hungry corn. The squash sprawls across the ground below, its big leaves shading out weeds and holding moisture in the soil. Three crops in one space, each doing a job for the others, feeding the people far better together than any of them would alone.
I name its origin on purpose. This knowledge belongs to the Indigenous peoples who developed it over countless generations, and permaculture owes it a real debt. When we teach the three sisters, we're teaching their science, and it deserves acknowledgment, not quiet absorption into a European framework as though we thought of it. Good design has always watched what works and learned from it. Honest design says where the learning came from.
Companion planting, with a grain of salt
You'll read long charts of which plants love or hate each other, companion planting lists. Some of it rests on solid ground, plants that draw pollinators, plants whose scent confuses pests, tall plants that shelter shorter ones. Some of it's folklore repeated so often it reads as fact. Use the charts as a starting point, not gospel. Then watch your own garden, because your soil, your climate, and your pests are the real authority. The plants will tell you what's working. Trust that over any list, mine included.
Try this: Pick one plant you want to grow, and instead of planting it alone, design a tiny guild around it. What could fix nitrogen beside it? What flower could pull in pollinators? What ground cover could keep its feet cool and the weeds down? Even three or four plants chosen to help each other is a guild, and planting it teaches you more than reading ten charts.
Chapter 12: Animals and their functions
Animals close the loops in a system. Handled well, they turn things you can't eat into things you can, they do work you'd otherwise do by hand, and they build fertility while they're at it. Handled badly, they're just mouths and mess. The difference is design, placing each animal where its natural behavior does a job you need done.
Every animal is a bundle of functions
Go back to the element analysis from chapter four. An animal is a set of needs, a set of products, and a set of behaviors, and the behaviors are often worth more than the meat or eggs.
Take the chicken again. It scratches the ground constantly, looking for food. That scratching, a nuisance in the wrong place, is exactly what you want in others. Let chickens into a bed after harvest and they'll scratch it over, eat the weeds and weed seeds, eat the pest larvae hiding in the soil, and fertilize it with their manure, leaving it cleared and enriched for the next planting. You didn't weed, you didn't spread fertilizer, you didn't deal with the pests. The chicken did all three by doing what a chicken does. That's the design mind at work. Match the animal's instinct to the task.
Ducks hunt slugs and snails better than any bait, and they're gentler on plants than chickens. Pigs root and dig, and penned on ground you want cleared and turned, they'll plow it for you and eat the roots and pests as they go. Grazing animals, sheep, goats, cattle, turn grass you can't digest into meat, milk, and manure, and moved thoughtfully across a pasture they can build soil and grassland health rather than wreck it.
The manure and fertility loop
Animals are fertility engines. They eat plants and turn them into manure, which is concentrated, ready food for the soil and the next crop. An animal in your system is a way of harvesting the fertility in rough plants, weeds, scraps, pasture, and depositing it where you want it, in a form the garden can use.
The trick is catching that fertility instead of losing it. Bed the animals on straw or wood chips and let the manure and bedding compost into rich soil. Run the manure through a compost pile before it hits the garden. Move grazing animals so their manure spreads across the pasture rather than piling up and burning one spot. Designed well, the animals become the link that moves nutrients from the wild and rough parts of your land into the productive heart of it.
Stacking animals into the system
The best animal design layers them into what's already there, integrate rather than segregate. Chickens or geese run through an orchard eat fallen fruit that would harbor pests, clean up dropped nuts, graze the grass, and fertilize the trees, all while the trees give them shade and shelter from hawks. A pond raises fish and ducks together, the ducks fertilizing the water that feeds the plants that feed the fish. Each animal fits a niche and does a job, the way every creature in a wild system has its place and its work.
The honest cautions
Two warnings, because animals are where good intentions go wrong fastest.
First, an animal is a daily responsibility and a living being that depends on you completely. It needs feeding, watering, shelter, and protection every single day, in the rain and the cold and when you'd rather not. Start small, start with something easy like a few chickens, and be sure you'll actually show up for them before you take on more. People care includes caring for the creatures in your charge.
Second, animals in the wrong place or the wrong numbers do real damage, and this is my restoration voice again. Too many grazing animals strip the ground bare, pack the soil hard, and turn pasture to dust. That overgrazing is exactly what had wrecked the Yucatan land I spent ten years bringing back, cattle on thin soil over limestone, grazing it down to rock. The same animal that builds soil when managed well destroys it when there are too many for too long in one place. Match the number of animals to what the land can carry, keep them moving, and never let them graze a place to exhaustion. The land's recovery, when we took the pressure off, showed me how much damage the pressure had been doing.
Try this: Think of one job you do by hand that an animal's natural behavior could do instead. Weeding a bed, clearing fallen fruit, turning the compost, mowing rough grass. You don't have to get the animal today. Just practice seeing the work through the design lens, matching an instinct to a task, because that's the whole art of bringing animals into a system well.
Part 4: Climate strategies
The principles are the same everywhere. The way you apply them changes completely with the climate. A design that thrives in a cold temperate valley would cook and die in the tropics, and a tropical design would freeze solid in the north. So this part takes the tools you've learned and shows how they shift across the two broad worlds I've worked in, the cold temperate and the hot dry-and-wet tropical. Between them they cover a lot of ground, and the way of thinking carries over to climates I haven't named.
Chapter 13: Temperate strategies
Temperate climate means real winter. Cold, often freezing, with a growing season bounded by frost at both ends, and usually rain spread across the year. This is the climate of my first twenty years, running a native plant nursery in southern Ontario, growing 350 species and supplying wetland and prairie and woodland plants across the province. The temperate world has its own logic, and here's what shapes design in it.
Winter is the design constraint
In the tropics the limit is often water or heat. In the temperate world the limit is cold, and the length of the season between the last frost of spring and the first of fall. Everything bends around that. Your tender crops have a window, and the window is shorter than beginners expect. So temperate design is largely about stretching that window and getting the most out of it.
This is where all the microclimate work from chapter six pays off hardest. Sun traps, thermal mass, south-facing slopes, walls that store heat, water bodies that moderate the cold. In a temperate climate these aren't refinements, they're how you buy the extra weeks that let a crop ripen. A warm sheltered pocket against a south wall might ripen fruit that fails ten steps away in the open. You're farming the microclimates as much as the soil.
Deciduous trees are your seasonal helpers
The temperate world gave us the deciduous tree, the tree that drops its leaves in winter, and it's a gift to the designer. Plant one on the sunny side of your house and it shades you through the hot summer, then drops its leaves exactly when you want the low winter sun to reach the windows and warm the walls. The tree adjusts the seasons for you, automatically, for free, forever. That's design working with the natural cycle instead of against it.
Deciduous leaf fall also hands you a yearly flood of free mulch and compost material. The forest builds its soil this way, a fresh layer of leaves every autumn rotting down into humus. You can do the same, gathering the leaf fall to feed your beds, or just letting it lie where it drops the way the woods do.
Design for the cold season, not just the warm
Beginners design for July and forget January. In a temperate climate the cold season is half the year, and the design has to work then too. Where does the snow pile up, and can you use that, since snow is water and insulation both? Where do the cold winds come from, and is there a windbreak on that sector? Is there anything to harvest or do in winter, cold-hardy greens under cover, stored roots, firewood from the woodlot, or does the whole system just sleep?
Season extension matters here. Simple unheated structures, a cold frame, a greenhouse, a low tunnel of plastic over hoops, trap warmth and push your growing weeks earlier in spring and later in fall. In a short-season climate these cheap shelters can double the time you're actually harvesting. Backed against a wall for thermal mass, oriented to the low winter sun, a small greenhouse becomes the warmest microclimate on the property and the place the season starts.
Perennials and the native palette
Temperate regions have deep, rich native plant communities, and you can build a lot of your system from them. Native fruit and nut trees, berry shrubs, and a huge range of perennial plants that come back every year without replanting, surviving the winter in their roots. Perennials are the permaculture favorite because you plant once and harvest for years, and they build soil and hold ground while they do it.
My nursery years taught me how much the temperate native palette offers, oak savanna, tallgrass prairie, woodland, and wetland communities, each a set of plants already adapted to the local cold, the local soil, the local water, and already woven into the local web of insects and birds. Building from that palette gives you plants that thrive on their own and feed the wild system at the same time. You don't have to fight your climate when you plant the things that evolved to love it.
Water in the temperate world
Water is usually less scarce here than in dry country, but it still needs managing. Spring brings meltwater and heavy rain, sometimes more than the ground can take at once, so temperate water design often deals with slowing and spreading a seasonal surplus, and with drainage in the wet spots, as much as with storage for drought. Swales, ponds, and rain gardens all have their place. And climate is shifting the pattern, with harder rains and longer dry spells showing up in places that never used to see them, so storing water for the dry stretch matters more than it once did even in wet regions.
Try this: Find out your average last spring frost and first fall frost dates for your area, a local garden group or extension service will know them. Count the frost-free days between. That number is your season, the real constraint you're designing around, and knowing it changes what you plant and how hard you work to stretch it.
Chapter 14: Dryland and tropical strategies
Now the other world. Hot climates, where the sun is fierce most of the year and the design problem is usually water, heat, or both. This is the climate of my last ten years, the northern Yucatan in Mexico, where I've worked a 39-hectare reserve on karst limestone. Tropical, no frost, a hard wet season and a hard dry season, sitting on porous rock that drinks the rain straight down. It taught me a completely different design language, and here's the shape of it.
In the heat, water is everything
Where the temperate designer fights the cold, the dryland and seasonal-tropical designer fights for water. Sometimes the total rainfall is low. More often, in the seasonal tropics, there's plenty of rain but it all falls in a few months and then nothing for the rest of the year, so the problem is holding the wet-season water long enough to carry life through the dry. And on limestone like ours, the rain doesn't even wait around on the surface. It sinks through the porous rock and vanishes underground almost as fast as it falls.
So everything in chapter eight, slow it, spread it, sink it, becomes survival rather than improvement. Catch every drop of the wet season. Store it in ponds, in tanks, and above all in the soil and the shade, where it can carry the system through the months of drought. In a place where water disappears into the rock, building soil that holds moisture is the whole game, because the soil becomes the reservoir the rock refuses to be.
Shade is a resource, not a problem
Here's the biggest flip for anyone coming from a cool climate. In the temperate world you chase sun and prize every open, sunny spot. In the hot tropics, full sun can be brutal, baking the soil dead, scorching young plants, and driving off what little moisture you've got. Shade becomes precious. The cool, moist, shaded ground under a canopy is where life gathers and where you want to work.
This is why the food forest is the natural model in the tropics, even more than in temperate ground. A layered canopy shades and cools the soil below, holds humidity, and protects everything under it from the sun's full force. You build from the trees down, using the tall ones to make the sheltered conditions the rest need. Rather than clearing land to plant in the open, tropical design often works the other way, keeping and building canopy and growing in its protection.
The land wants to recover, and it showed me
The Yucatan reserve is the clearest proof I have of the idea this whole manual rests on. When we started, that land was worn down, overgrazed karst, cattle having stripped thin soil off limestone until much of it was bare rock. It looked, to most eyes, finished.
We mostly took the pressure off. Removed the cattle, stopped the burning, and helped the native tropical forest do what it was already trying to do. We planted, we nursed things along, we worked, I won't pretend it was effortless. But the engine of the recovery was the land itself. Ten years on, that ground holds 514 documented species and a closed forest canopy where there used to be exposed rock. The soil is rebuilding. The water holds longer. The wild system came back, because it wanted to, and our job was mostly to stop the harm and give it a hand.
I tell you this in the tropical chapter because the tropics recover fast when you let them. The heat and the wet season that make the climate hard to garden also make it grow with astonishing speed once the soil and the cover come back. That's the hopeful edge of hot-climate work. Take the pressure off, protect the recovery, and the abundance returns quicker than you'd believe.
Dryland techniques worth knowing
In genuinely dry country, a few techniques carry a lot of weight. Heavy mulch, laid thick, to shade the soil and hold every bit of moisture against the sun. Water-harvesting earthworks, shaped to catch and sink the rare, hard rains where plants can use them rather than letting them run off and cut gullies. Planting into small pits or basins that gather runoff around each plant's roots. Choosing tough, drought-adapted species that expect the dry and don't sulk through it. And windbreaks against hot, dry, desiccating winds, which steal moisture as surely as the sun does.
The through-line is the same everywhere. Read the forces your climate throws at the land, then design to catch what's scarce and buffer what's harsh. In the north that meant trapping warmth against the cold. In the Yucatan it means holding water and shade against the heat. Same principles, opposite tactics, one way of thinking.
Try this: Whatever your climate, name its single hardest limit in one word. Cold. Drought. Heat. Wind. Poor soil. Then walk your site and find the one place that limit is least severe, the warm pocket, the moist shaded corner, the spot the wind misses. That's where your system wants to start. Design outward from the easy spot toward the hard ones, and let the land's own gentler pockets carry you.
Part 5: People, structures, and putting it together
Chapter 15: The built environment and home systems
Permaculture design doesn't stop at the garden fence. The house and the built parts of your site are elements too, and the same principles apply. A well-designed home works with sun, wind, and water the way a well-designed garden does, catching what's useful and buffering what's harsh, so it needs far less energy to keep comfortable.
The house as a climate catcher
A building sits in the same sun and wind sectors as your plants, and you can orient and shelter it the same way. In a cold climate, a house designed to face the low winter sun, with its windows placed to let that sun in and thermal mass inside to store the warmth, heats itself a surprising amount for free. Shelter its cold-wind side with a windbreak or bank earth against it, and it loses less of that warmth. Deciduous trees on the hot side shade it in summer and let the sun through in winter, the same trick from the temperate chapter, applied to the building.
In a hot climate you flip it. Shade the house, especially its sun-struck walls and roof, open it to catch cooling breezes, and use the mass of the building and surrounding plants to hold the cool of the night into the day. A vine-covered wall, a shade tree over the roof, a breezeway aligned to the prevailing wind. These do the work an air conditioner would otherwise do, quietly and for nothing.
The point is that a building placed and shaped with its climate in mind does much of its own heating and cooling. Placement is most of design, indoors as much as out.
Closing the loops around the home
The house produces steady flows you can catch and use, produce-no-waste applied where you live. The roof sheds clean rainwater into a tank or a garden. The kitchen produces scraps for the compost or the chickens. The sink and shower produce greywater for the fruit trees. The whole household, seen as a system, turns out to be a small factory of resources most people pipe straight into the waste stream.
Design the home's flows to feed the land. Site the compost near the kitchen door so scraps actually make it there. Run the roof water where you want it. Put the greenhouse against the house so they share warmth. Place the woodshed on the path you already walk. Zone thinking applies right up to and inside the walls. The things you handle daily belong within easy reach, and the flows of water and nutrient belong aimed at the parts of the land that can use them.
Energy, simply
I'm not going to turn this into an engineering manual, but the principle holds. Catch and store energy applies to the home's power and heat the same as to the garden's water. Design first so you need less, a well-oriented, well-sheltered, well-insulated building needs a fraction of the energy a badly placed one does. Then, where it fits your means and your site, catch what renewable energy you can, sun for power and hot water, wood from your own woodlot, the warmth the building itself gathers. Reduce the need first, then supply what's left from flows that renew. That order, need less before you generate more, is the cheapest and soundest path, and it's just good design.
Try this: Stand in your home and find one flow leaving it as waste. The roof water down the drain, the kitchen scraps in the bin, the shower water down the pipe. Trace where it goes, then imagine where on your land it could go instead to do some good. You don't have to plumb it today. You're learning to see your house as part of the system, not separate from it.
Chapter 16: Invisible structures
Everything so far you can see and touch. But a design lives inside a set of things you can't, the people, the agreements, the money, the way decisions get made. Permaculture calls these the invisible structures, and they decide whether a beautiful physical design survives or falls apart. I've watched good land projects fail not because the ecology was wrong but because the people arrangements were, so this chapter earns its place.
The people are the hardest part
I'll be blunt about something thirty years has taught me. The plants are the easy part. The people are hard. A garden design is a puzzle with a solution. A group of humans sharing land, work, and decisions is a living relationship that needs tending as carefully as any soil.
Most community land projects that fail, fail on the human side. Unclear who decides what. Unspoken expectations that curdle into resentment. Work shared unevenly until the people carrying it burn out and leave. Money never talked about honestly until it becomes a fight. None of that is ecology, and all of it kills projects. So if you're designing anything involving more than yourself, design the human structures with the same care you give the water.
That means naming things out loud that people would rather leave vague. Who makes which decisions, and how? How is the work divided, and how do you keep it fair as life changes? How is money handled, and who sees the books? What happens when someone wants to leave, or when two people disagree and can't resolve it? Agreeing on these while everyone's still friendly is a hundred times easier than sorting them out in the middle of a conflict. The clear agreement is a kindness to your future selves.
Fair share, lived out
The third ethic, fair share, is really an invisible structure. It's the culture you build around surplus, and it only becomes real in how a group actually shares the harvest, the work, the decisions, and the wealth. A design can be perfectly sustainable ecologically and still be unjust, hoarding its yield or leaning on a few people's unpaid labor. Fair share asks you to build the sharing into the structure, not leave it to goodwill.
That reaches beyond your own fence, too. A productive piece of land sits in a neighborhood, a watershed, a community. Sharing surplus food, sharing knowledge, sharing seed and labor and tools with the people around you builds the web of relationships that carries everyone through hard times. The old rural cultures knew this. Resilience was never one self-sufficient homestead. It was neighbors who showed up for each other.
Knowledge is the structure that matters most
Here's the invisible structure I care about more than any other, and it's why I teach at all. Knowledge that stays locked up helps no one. Ecological understanding that never leaves the universities and the experts is understanding wasted, when the people who could actually heal the land are the ordinary folks who were never let into the room.
So I'll say plainly what I believe. Don't gatekeep. Share what you learn as widely as you can, in language a person without a science degree can use. Teach the next person. Make sure the one who can't afford the course still gets in the door somehow. The whole point of this work is to get restoration and good design out of the small circle of people who already care and into the hands of everyone who wants to help. That spread, person to person, garden to garden, is itself a design, and it's the one that decides whether any of this scales beyond a few nice properties into something that actually changes how we live on the land.
Bioregionalism, thinking at the right scale
One more idea worth carrying. A bioregion is an area defined by its natural features, a watershed, a set of native species, a climate and soil, rather than by lines drawn on a political map. Thinking bioregionally means designing in tune with the actual living region you're part of, its water, its native plants and animals, the knowledge of the people who've lived there longest. It pulls your attention to the right scale, bigger than your fence, matched to how nature actually organizes itself. Your site is one cell in a living region, and it works best when it fits the region it's in.
Try this: If your project involves other people, pick the one agreement you've all been avoiding, the money, the decisions, the division of work, and name it out loud together this week. If you're working alone, do the knowledge version instead. Teach one thing you've learned from this manual to one other person. Either way, you're building the invisible structure that decides whether the visible one lasts.
Chapter 17: The design practicum, putting it all together
Here's where it all comes together. You've got the ethics, the principles, the way of seeing, and the elements. Now you design a whole site, start to finish, using the sequence this manual has been building toward. This chapter is your walk-through. Follow it on real land, even a small yard, and you'll have done permaculture, not just read about it.
Step one: observe and record
Go back to chapter four and do the work. Spend real time on the land. Sit in your sit spot. Walk it in rain and sun and wind. Watch where the water goes, where the sun falls, where the frost sits, where the wind funnels, where the soil is deep and where it's thin. If you can watch across seasons, do. Record it all on a rough map, the boundaries, the buildings, the big trees, and then the layers of water, sun, wind, slope, and soil laid over top.
Don't rush this. Every hour of watching here saves you a season of fixing later. The map you build is the ground your whole design stands on.
Step two: name your needs and the site's character
Two honest lists. First, what you want from this land, food, income, beauty, privacy, a place for children, habitat for wildlife, and how much time and energy you can really give it. Be truthful about the last part, because a design that assumes more time than you have will fall apart. Second, the site's real character, what it offers, what it lacks, and the forces coming in from outside. Put your wants and the site's reality side by side. The design lives in the space where they meet.
Step three: place the big patterns first
Design from patterns to details. Before a single plant, settle the big moves. Where does water get caught and stored, high in the system so gravity can carry it down? Where does access run, the paths and roads you'll use daily? Where do the zones fall, the intensive ground close to the house, the wilder ground far out, including a zone 5 you leave to its wild self? How do the sectors shape it, the sun you keep open, the winds you block, the nuisances you screen?
Get this skeleton right and the details drop into place almost on their own. Rush past it to the fun details and you'll be moving things for years.
Step four: place the elements and connect them
Now the specifics, and here's where integrate rather than segregate does its work. Place each element where it can help and be helped by the ones around it. Run the element analysis, needs and products and behaviors, and connect them. The greenhouse near the house for shared warmth and daily visits. The chickens between the orchard and the garden so they clean up fallen fruit and their manure has a short trip to the beds. The compost on the path you already walk. The pond high enough to feed what's below it. Every element earning several yields, every important need met by more than one source.
Design guilds around your key trees. Stack the food forest in its layers. Multiply the useful edges. Lean on the native palette so the system feeds the wild web while it feeds you, and where you reach for a non-native, choose one that won't escape and do harm. The whole toolkit of the middle chapters comes to bear here.
Step five: build it small and slow
Don't try to build the whole design in one heroic season. You'll exhaust yourself and lock in the mistakes you haven't discovered yet. Start with the part you're surest of and the part that gives an early yield, and build out from there as the land teaches you and your confidence grows. Use small and slow solutions. A garden this year teaches you what the farm needs next year, for the price of a weekend instead of a fortune.
Get some quick wins in early, a bed of vegetables, a few fast shrubs, while the slow backbone of trees matures. Those early yields keep you fed and keep you going through the years the big system takes to come on.
Step six: watch, learn, and adjust, forever
The design is never finished, and that's not a flaw. Apply self-regulation and accept feedback. The land responds to everything you do, and it tells you plainly what worked and what didn't, in yellow leaves and standing water and the crop that thrives or sulks. Read that feedback and change the design. A living design keeps evolving alongside the living system it's part of. Creatively use and respond to change, because change is the medium you're working in, and the good designer expects it and steers it rather than fighting to hold a plan still against a world that won't stop moving.
The mindset that carries it all
I'll close the practicum with the thing under all the technique. Design from humility, not control. You're not imposing your will on a passive piece of dirt. You're joining a living system that has its own intelligence and its own direction, and your best work is to read that direction and help it along. Remove the obstacles. Add what's missing. Then get out of the way and let the land do what it's been trying to do all along.
The land wants to recover. Everything in this manual is just method for helping it, and the recovery, when it comes, is the land's doing more than yours. Hold onto that. It'll keep you humble in your successes and hopeful in your setbacks, and it's the truest thing I know about this work.
Try this: Design one real space, however small. A yard, a bed, a corner of a community garden, a balcony in pots. Walk all six steps, from observing to building the first small piece. Write it down. Then plant something this week. The manual ends here, but your practice starts the moment you put your hands in the soil.
Glossary
Aspect. The direction a slope faces, which shapes how much sun and warmth it gets.
Bioregion. An area defined by its natural features, watershed, climate, native species, rather than political borders.
Companion planting. Growing certain plants together because they help each other, through pest confusion, pollinator attraction, or shelter.
Contour. A line across a slope that stays at the same height the whole way. Water sits still on a true contour instead of running along it.
Dynamic accumulator. A deep-rooted plant that draws minerals up from far down in the soil and releases them near the surface when its leaves are cut and dropped as mulch.
Earthworks. Shaping the land, ditches, mounds, ponds, basins, to catch, slow, store, or move water.
Edge. The boundary where two systems meet, richer in life than either system alone. The edge effect is the extra abundance found there.
Food forest, or forest garden. A planting built in layers like a natural forest, using species that feed people or do useful work, largely self-maintaining once established.
Greywater. Gently used household water from sinks, showers, and washing machines, reusable for irrigation.
Guild. A small, deliberate community of plants chosen to support each other, usually built around a central tree.
Humus. The dark, stable, crumbly end product of decayed organic matter, the treasure of a living soil.
Keyline. A water-planning approach, developed by P. A. Yeomans, that spreads moisture evenly across a slope by moving it from the wet valleys toward the dry ridges.
Macroclimate. The large regional climate pattern you can't change.
Microclimate. A small pocket on your site that runs warmer, cooler, wetter, drier, or more sheltered than the general area, and which you can find and even create.
Monoculture. A single crop grown alone across an area. Productive in the short term, fragile in every sense.
Mulch. Any material laid over the soil surface to protect it, hold moisture, suppress weeds, and feed the soil as it breaks down.
Mycorrhizal fungi. Fungi that partner with plant roots, extending their reach for water and nutrients in exchange for sugars.
No-dig, or no-till. Building soil from the top with compost and mulch while leaving it undisturbed, protecting its structure and life.
Perennial. A plant that lives and produces for many years rather than dying after one season.
Polyculture. Many crops grown mixed together, mimicking a natural community, more stable and productive than monoculture.
Sector. A direction from which an outside force, sun, wind, water, fire, noise, arrives on your site.
Succession. The natural progression of an ecosystem from bare ground toward mature forest or its climax community. Good design works with it and can speed it up.
Swale. A shallow ditch dug level along the contour to catch runoff and sink it into the ground.
Thermal mass. Material, water, stone, masonry, earth, that soaks up heat and releases it slowly, steadying the temperature nearby.
Zone. A band of the site organized by how often you visit it, from the intensive ground by the door (zone 1) to the wild land you leave alone (zone 5).
Where to go next
Read the founders in their own words. Bill Mollison's Permaculture: A Designers' Manual is the deep reference for the whole field. His Introduction to Permaculture is the gentler starting point. David Holmgren's Permaculture: Principles and Pathways Beyond Sustainability lays out the twelve principles this manual teaches.
Take a Permaculture Design Certificate course if you can, in person best of all. A good one runs the classic curriculum over roughly seventy-two hours and puts you in a group designing real sites. Reading gets you the ideas. Doing it alongside other people gets you the practice, and you learn as much from their sites and mistakes as your own.
Learn your own bioregion. Find the local native plant society, the watershed group, the growers and restorers already working near you. The best knowledge for your land is specific to your land, and it usually lives in the people who've been paying attention to that exact place for years.
And learn from the people who lived on your ground before it was farmed or fenced. Indigenous and local land knowledge, where it's shared with you, is often the deepest design wisdom available, tested over far longer than permaculture has existed. Honor it, name it, and never take it as your own.
Then go outside and start. A design on paper is a beginning. The land is where you actually learn, and it's patient, and it's been waiting a long time for hands willing to help it recover.
Courses, websites, and associations
Here's where to go deeper. I've kept this list short and honest, only places I'd actually send a student. Before you spend money or hours on any of them, one filter. Look for real field experience behind the teaching. Ask what the person has grown, restored, or built, not just what they teach. The internet is full of permaculture that's never had dirt under its nails, and you can feel the difference the moment you're standing on someone's land.
Web addresses change and courses come and go, so if a link has moved by the time you read this, search the name and you'll find where it went.
Taking a Permaculture Design Certificate
The Permaculture Design Certificate, the PDC, is the recognized foundation course. The standard is seventy-two hours of contact time with a teacher, and a good one puts you in a group designing real sites. In person and residential is best if you can manage it, because you learn as much from the land you're standing on and the people beside you as from the lessons. Online works if that's what fits your life, and the good online courses are genuinely good now.
A few solid places to start:
Permaculture Association (Britain) keeps a directory of certified courses and explains clearly what a PDC is and how to choose one. A good first stop even if you're not in the UK.
Discover Permaculture with Geoff Lawton runs a well-regarded online PDC taught in the direct line from Bill Mollison, and Lawton's home site Zaytuna Farm hosts residential courses in Australia. His teaching on water and drylands is some of the best out there.
Oregon State University's online PDC, taught by Andrew Millison, is a university-backed online option with a clear structure, good for people who want a paced course with real support.
And look for a teacher near you first. A PDC taught on ground like yours, in your climate, is worth more than a famous name teaching a landscape you'll never work in. The association directories above will point you to local ones.
I'll name my own work too, since this is a Planet Healers manual. Planet Healers runs courses, guides, and field intensives grounded in thirty years of restoration across temperate and tropical ground, and the free Path app gives you a daily practice to start right now, sit spots, species logging, and planting records. It's the doorway I'd point you through, because it's the one I know holds up.
Websites and forums
Permaculture News has run for years out of the Permaculture Research Institute, with articles from practitioners all over the world. A deep archive to wander through.
Permies is a big, active forum run by Paul Wheaton. Ask a real question about your soil or your slope and you'll get real answers from people who've tried it. One of the better corners of the internet for this work.
Permaculture Magazine offers practical articles, project stories, and course listings, from the UK but useful anywhere.
Channels worth your time
Video won't teach you to design on its own, but watching someone work through a real site is a fine way to train your eye. A few I'd trust:
Andrew Millison teaches clearly and travels to tour big regenerative water projects around the world, from India to the American Southwest. Good for seeing design at a scale most books skip.
Discover Permaculture with Geoff Lawton covers the foundations of design, water, and reading a landscape.
Edible Acres is a small nursery in cold-climate New York, honest and hands-on, strong on propagation and doing a lot with a little. This is the channel that shows real hands in real soil, which is exactly what I'd steer you toward.
Huw Richards makes food growing approachable for beginners, gentle and clear.
Lean toward the channels where you can see the person actually working the ground, and be a little wary of the ones that are all talk and drone shots.
Associations and networks
Permaculture Association (Britain) is the hub for the movement, with a member directory, research projects, and course listings.
The Permaculture Institute of North America, known as PINA, certifies teachers and courses across the continent and is worth a search if you're in the US or Canada and want to check a course's standing.
For the Spanish-speaking world and closer to my own ground in Mexico, a few networks connect people and projects across the region: Permacultura en México, Permacultura América Latina (PAL), and the Convergencia Latinoamericana de Permacultura (CLAP). The Permaculture Association also keeps a Latin America page pointing to regional contacts.
And because this manual keeps one foot in restoration, one more. The Society for Ecological Restoration is the professional home for the native-and-reference side of the work, the wilder end of the spectrum this whole book has been walking. If your heart pulls toward bringing land back to what belongs there, that's the door.
A last word on all of it. Favor knowledge rooted in your own bioregion, and in the people who've lived on your land the longest. The best resource for your ground isn't a famous course or a popular channel. It's the local native plant society, the watershed group, the old farmer down the road, and the Indigenous and local communities whose knowledge of that exact place runs deeper than any of us. Honor it, name it, and never take it as your own.
Planet Healers | Paul Morris. Grounded in thirty years of restoration across temperate Ontario and the tropical Yucatan. Tsunul Reserve, 39 hectares, 514 documented species and counting. The land wants to recover. Our work is to help it.